Some people were asking me for a tutorial to show these techniques in greater detail. So I've made this Youtube tutorial to give more detail on how to do them.
Daniel Keating
Senior Artist - Environment/Tech Art
Houdini Rope Bottle Tutorial
Tutorial / 22 May 2024
I made a tutorial that shows how to cover a bottle in rope. I thought it would be a useful example of some basic modeling concepts.
Subtstance Painter Generator tutorial for Substance Designer
Tutorial / 30 April 2023
I made this tutorial to show you how to make custom generators in substance designer that can be used in substance painter
Houdini Cushion Tutorial
Tutorial / 18 April 2023
I made this tutorial to show a technique in Houdini for creating upholstery.
Maya shaderFX vertex blending tutorial
Tutorial / 09 April 2023
I made a tutorial demonstrating how to create a vertex color blended shader using shaderFX
Secret Maya flags for PolyEvaluate
Tutorial / 24 May 2022
If you're familiar with scripting for Autodesk Maya you've probably used the PolyEvaluate command. This command is useful for getting information on object vertex count, bounding box size, face area, and many other things. To get the vertex count of an object you would use it like this:
vertex_count = cmds.polyEvaluate(vertex=True)
This is the current documentation on PolyEvaluate:
https://help.autodesk.com/cloudhelp/2016/ENU/Maya-Tech-Docs/CommandsPython/polyEvaluate.html
However I was looking at some of the scripts that come with Maya and I was surprised to find some flags that aren't in the documentation.
These flags are:
uvShell ( -us )
activeUVShells ( -aus )
uvsInShell ( -uis )
uvShell Flag
This flag returns the ID numbers of shells associated with selected faces. Here you can see me using the mel version of the command on a cube:

activeUVShells Flag
This flag returns a numbered list of the selected UV shells in a mesh. Here you can see me using the mel version of the command on a cube:

uvsInShell Flag
This returns a list of the uv points in a specified UV shell. You need to specify the UV shell after the flag. The UV shell number is one of the numbers the other commands return. Here you can see me using the mel version on a cube.

I have found out that these are documented in the pyMel documentation. However I've tested them and they work fine with Mel and normal Python.
Batch FBX import for Maya
Tutorial / 24 August 2021
In Maya if you want to import multiple FBX files you're supposed to be able to drag and drop them into a blank scene. However if you've changed your default settings you'll get a problem where it pops up a warning dialog and only imports the first FBX.
That looks like this:
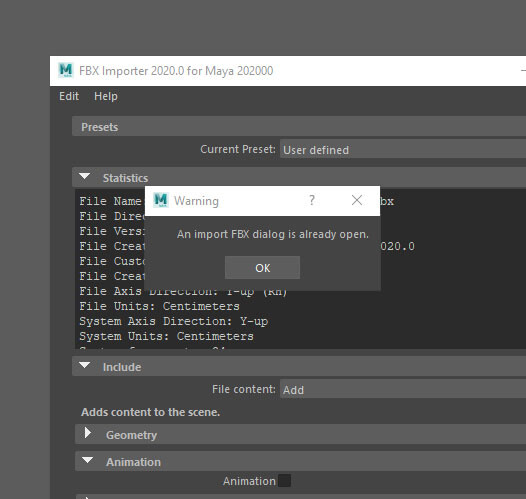
There's a whole thread about it here:
I wasn't interested in figuring out the exact setting in the preferences that caused this. So instead I made this very basic script to do it (below) and I thought other people might like to use it. (I created a shelf button with this code in it)
string $files[] = ` fileDialog2 -fileFilter ("*" + ".fbx") -fm 4 -okc "Select Files"`;
for ($file in $files){
    FBXImport -file $file;
}
This Script will import everything you select in the dialog that pops up when you run it. It will use whatever FBX settings you used last time you imported a FBX.
Making Islamic Lattices in Houdini
Tutorial / 07 June 2021
I was interested in making something with ornate lattices and I became curious to see if I could recreate some traditional Islamic lattices using Houdini. So I ended up making these two patterns you see below.
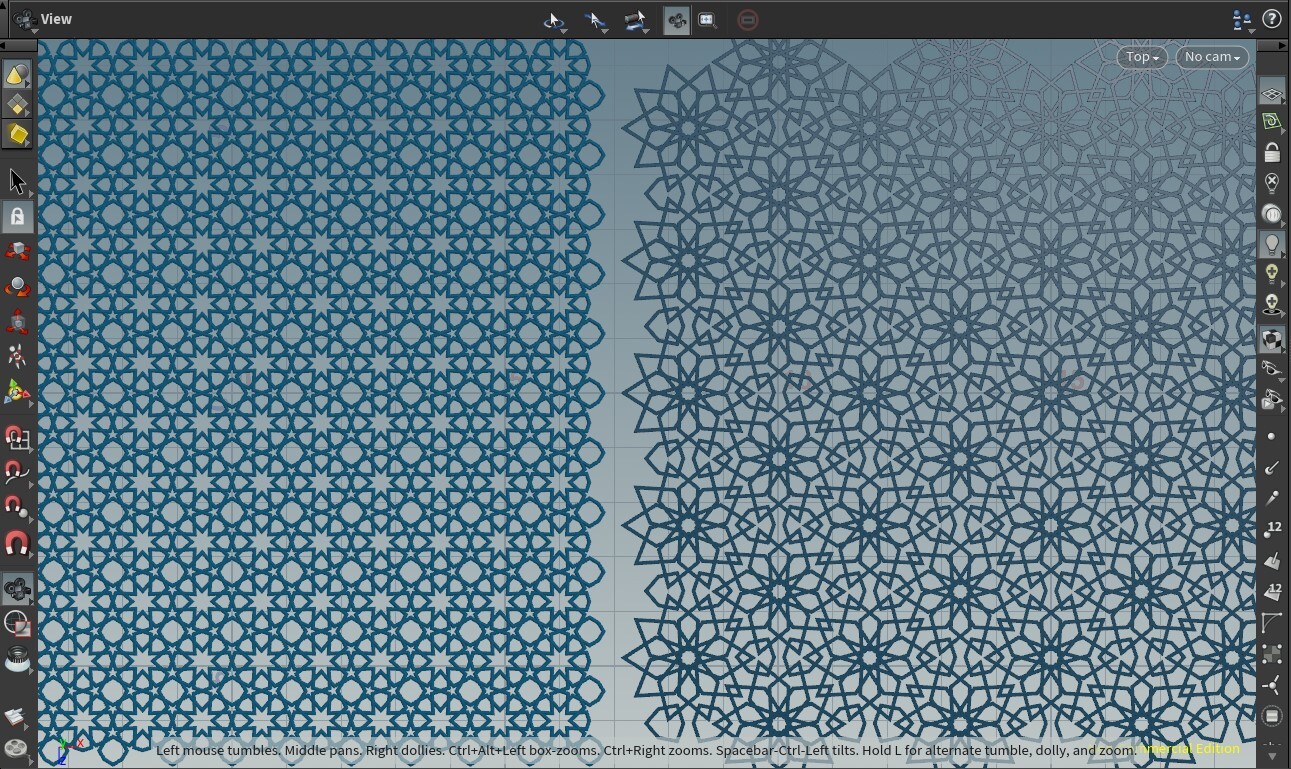
Pattern One - 8 point rosette
The first pattern is made by creating a 16 sided circle and pulling four points in towards the center to create a "plus sign" shape. This is then copied and rotated to make the shape below.

After repeating the pattern on a grid the gaps in between the rosettes are filled with hexagonal shaped stars (outlined in red below)

The final pattern

Pattern Two - 9 point rosette

This next pattern is created by;
- making a grid
- dividing the edges using a resample node
- pulling two of the corners towards the center - I also gave the overall shape a bit of a scale to make it pointy looking
- copy and rotating the final result 3 times


This final shape was repeated and then the gaps filled in using some subdivided triangles. That you can see in the first image.
Quick script for changing smoothing values across multiple objects
Tutorial / 08 December 2020
This is a Mel script for Maya I made to answer a question on polycount.
What it does is loop through selected objects and sets the smooth mesh vertex boundary value to 'sharp edges' instead of 'sharp edges and corners'.

It is also an example of a basic script that sets attributes on the shape node - you could switch the attributes for any others without any problems. To use it, make a new button in the shelf editor, and copy and paste the below code into the command window.
//set smoothing boundary script
//first get selected meshes
string $meshes[] = `ls -sl -tr`;


//loop through transforms
for( $mesh in $meshes) {
    string $meshShapes[] = `listRelatives -s -f $mesh`;


    //loop through shapes setting the value
    for( $shape in $meshShapes){
        setAttr ($shape + ".osdVertBoundary") 2; //this sets the vertex boundary on the OpenSubdivControls
    }
}